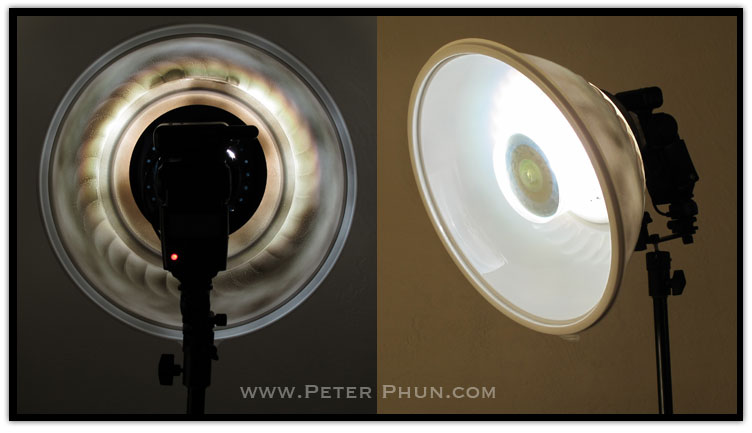
 Do-it-yourself projects for photographers abound on the internet.
Many are not worth the time, expense and effort.
Occasionally I come across one that is intriguing, easy and cheap that I can’t resist trying it myself.
A search for the keywords ‘beauty dish‘ will turn up a slew of tutorials and even videos on how to make one.
They range in complexity, design and build.
The toughest ones made of metal resemble ones sold commercially.
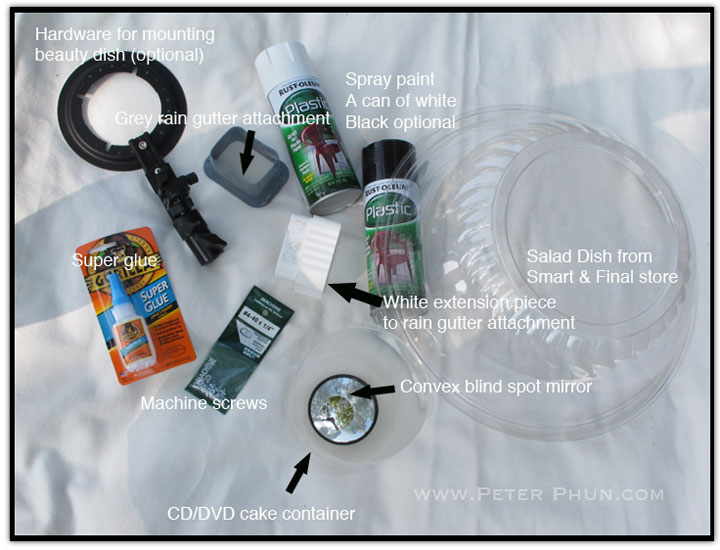 The low budget one, the one I am attempting, is made of:
- a salad dish made of recyclable plastic (Smart & Final $5)
- rain gutter hardware pieces ($4 from Home Depot)
- CD/DVD cake cover (salvaged from my office)
Other items needed:
- Superglue
- 7 pieces of small nut and bolts
- White Spray paint
- Black Spray paint (optional to make it look nice)
- Xacto knife
- Dremel tool or a sharp ice pick to punch holes in the plastic surfaces
Expect to do a lot of testing before you come up with a winning design that works to your liking.
Procedure
This project should be tackled in 2 distinct parts:
- reflector portion
- the dish portion
Reflector portion
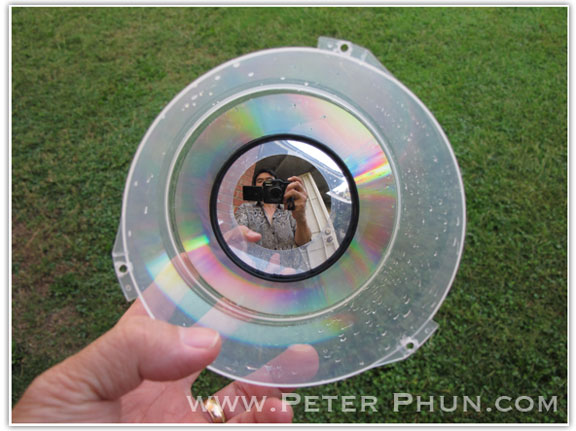 Superglue a CD with the shiny side facing down towards the opening.
Too tough to picture what I”m talking about?
You should be able to see yourself when you look inside.
Attach the convex mirror with superglue as well to the CD inside the CD cake container.
Let the superglue dry and harden.
Resist continuing until the glue hardens.
Yours truly found out the hard way because he was impatient. 😉
Drill small holes into the base of your dish to match the little wings of the CD cake container.
This will be the anchoring point of the reflector to the inside of the dish.
Dish portion
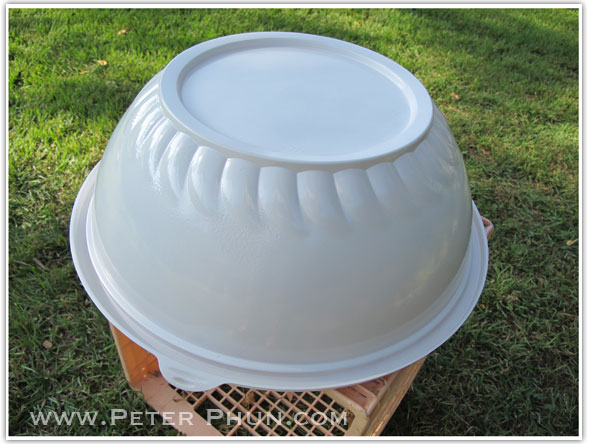 Spray paint the clear dish on the outside with white paint.
Be sure to be extra generous with multiple coats of white and let it dry and cure.
Use the rain gutter attachment as a template to cut a similar size and shaped hole in the middle of the dish.
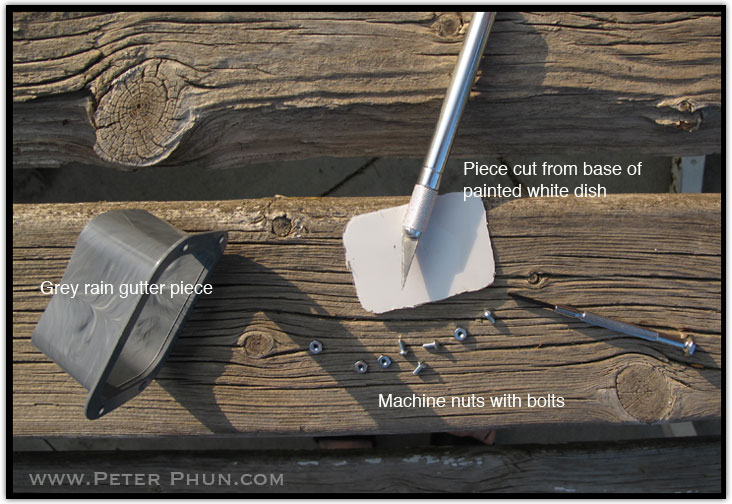
I used an Exacto blade since the dish is really very thin.
I used a Dremel tool to drill 4 small holes that match the rain gutter attachment’s 4 holes.
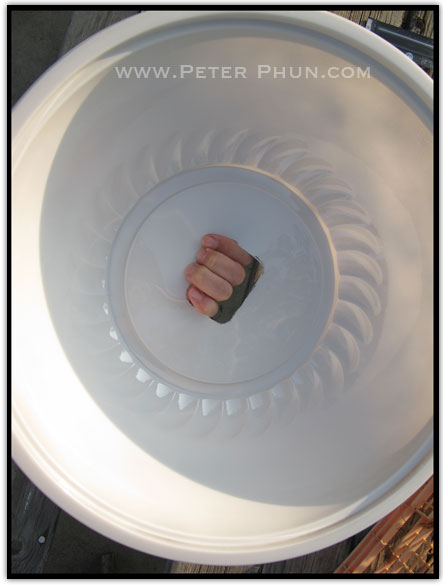 After you insert the screws and attach the dish to the rain gutter attachment, turn your attention to the CD cake container.
The base of my reflector or the CD/DVD cake container has just only 3 ‘wings’ so I drilled 3 holes to be used as my anchor points to the dish.
I used 4 nuts and bolts to secure the plastic rain gutter piece to the underside of the painted dish right in line with the hole I had cut in the middle.
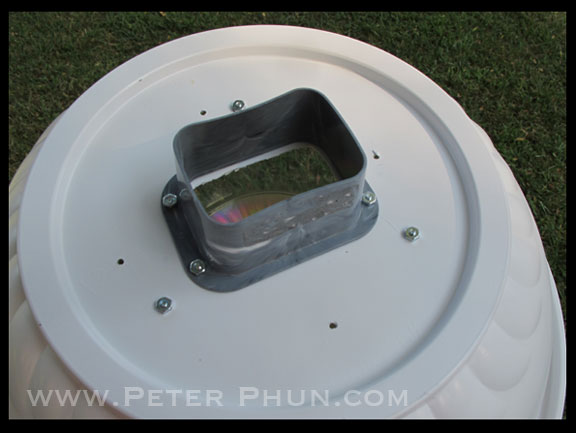
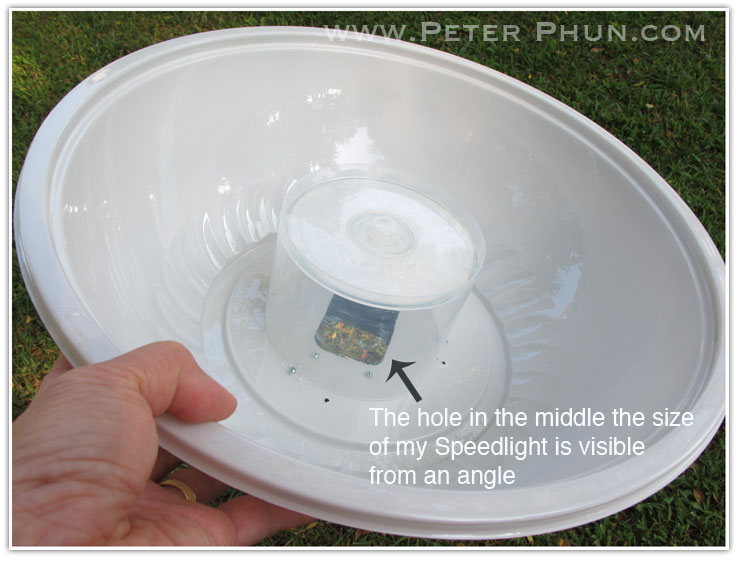
Then it was time to use the 3 nuts and bolts to attach the reflector portion to the inside of the dish.
Because the entire assembly is quite light, I am confident 3 anchoring screws should be sufficient.
The grey rain gutter attachment I bought is too narrow to fit my Speedlight’s flash head, so I added a white extension piece which is broader.
Now the Speedlight fits snugly into the whole assembly.

Also, I purchased a piece of hardware meant for mounting a Speedlight in a cold hotshoe.
This piece of hardware is intended for a mounting a Speedlight to a softbox but it will serve the purpose to take the stress and load off the dish.
Note, my Canon Speedlight 580EX is sitting on a hotshoe adapter which is connected to a Cybersync receiver.
This piece of mounting hardware is flexible enough that I can change the height of the Speedlight.
It’s an optional piece, but if you plan on mounting the beauty dish on a light stand, this fixture will be necessary to take the strain off the hotshoe mount of your flash.
Go ahead on mouseover the image of this piece of hardware to see the view from behind.
Next: moment of truth… does it work?
Peter Phun Photography

Promote Your Page Too
Ted,
I’m working on the second version of this since I have more than one Speedlight. I agree the black finish makes it look good but I suspect the black also helps to kick back more light since it’s more reflective.
Looks good. I used an entire can of white primer to coat the bowl, then I painted the bowl black. The fact the primer isn’t glossy doesn’t matter, because the natural sheen on the bowl is nice and shiny. The black gives the bowl a nice finished look. It also prevents the bowl from illuminating when the flash is fired.